Why Does Tighter Knitting Gauge Make the Same Stitch Count Smaller?
When more stitches fit into the same measured width, each stitch occupies less width on average. If you keep the total stitch count unchanged, the modeled piece is narrower. Calculate that width by dividing the total stitches by the measured stitches per inch.
This explains a size difference; it does not prove that changing one count will correctly resize a whole knitting pattern.
Compare equal measurement spans first
A pattern gauge of 20 stitches over 4 inches means 5 stitches per inch. A swatch measuring 25 stitches over 4 inches means 6.25 stitches per inch. Comparing 20 with 25 is meaningful because both counts cover the same distance.
Use a sample representative of the intended fabric. The Craft Yarn Council's gauge instructions recommend swatching with the specified yarn, tools and pattern stitch. Follow the selected pattern and yarn care instructions for the swatch's treatment, and measure the stated area. Do not compare a pattern's stitch gauge with your row count.
The FiberTools gauge calculator can convert the measured width, height, stitch count and row count into gauge. Enter the actual measurement span instead of assuming every sample is exactly four inches.
Keep 200 stitches and compare the modeled widths
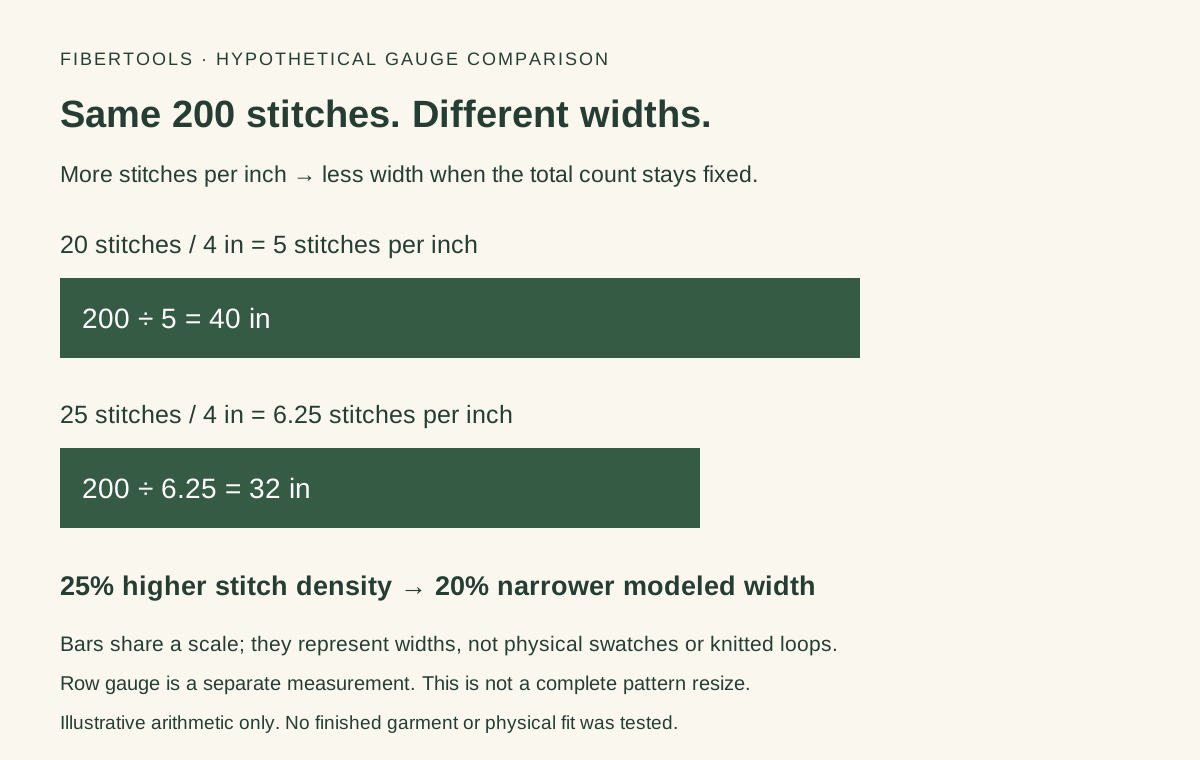
Suppose a hypothetical flat panel uses 200 stitches. At 20 stitches per 4 inches:
200 ÷ (20 ÷ 4) = 40 inches.
If your representative swatch instead measures 25 stitches per 4 inches, the same count gives:
200 ÷ (25 ÷ 4) = 32 inches.
That is an 8-inch difference. These figures are illustrative arithmetic, not measurements of a knitted panel we made.
Notice that a 25 percent increase in stitches per inch does not mean a 25 percent decrease in width. Gauge rises from 5 to 6.25 stitches per inch, but width falls from 40 to 32 inches: a 20 percent decrease. Width is divided by gauge, so the relationship is reciprocal.
| Hypothetical measurement | Pattern reference | Your swatch |
|---|---|---|
| Stitches over 4 inches | 20 | 25 |
| Stitches per inch | 5 | 6.25 |
| Width at 200 stitches | 40 inches | 32 inches |
This comparison assumes the swatch density applies across the planned fabric. Edges, shaping and other sections need their own consideration.
Row gauge changes a different dimension
Now suppose the pattern reference is 24 rows per 4 inches and your swatch measures 28 rows per 4 inches. That means 6 rows per inch versus 7.
For a fixed 120-row section, the modeled heights are 120 ÷ 6 = 20 inches and 120 ÷ 7 ≈ 17.14 inches. The row-gauge difference is separate from the stitch-gauge difference above; one cannot be inferred from the other.
Read whether the pattern tells you to work a fixed number of rows or to continue to a stated measurement. Do not automatically replace a row count when the instructions also schedule shaping or depend on a repeat. The calculator's arithmetic does not resolve those design requirements.
What would preserving the width require mathematically?
At 6.25 stitches per inch, a 40-inch width corresponds to 40 × 6.25 = 250 stitches. The same result comes from scaling the original count: 200 × 25 ÷ 20 = 250.
That 250 is one arithmetic checkpoint. It is not an approved replacement cast-on for a sweater, and it does not update increases, decreases, edges, stitch repeats, seams, armholes or yarn requirements. The gauge calculator's count-scaling explanation explicitly limits its result to the counts supplied.
For the row example, preserving a 20-inch height at 7 rows per inch would require 140 rows mathematically. Whether those rows belong in the pattern requires reviewing its actual instructions.
Choose a next step with the pattern in front of you
If you are following a tested pattern, first check that your swatch uses the specified stitch pattern and construction and that you measured it correctly. Compare both stitch and row gauge. Where appropriate, make another swatch with a different needle size and measure again; the Craft Yarn Council describes changing needle size when a swatch's dimensions differ from the target. No specific needle-size change guarantees a particular correction.
If you deliberately choose a different gauge, review every affected instruction before proceeding. Save the pattern gauge, your measured gauge, counts, resulting modeled dimensions and any unresolved design questions. This makes a useful planning record without presenting a partial calculation as a complete redesign.
Can matching stitch gauge alone guarantee fit?
No. This calculation only models dimensions from density and count. Row gauge, the pattern's construction and sizing instructions, and the finished fabric still matter. Neither the diagram nor a calculator result verifies a garment's fit.
Can I use measurements in centimeters?
Yes, provided you use matching units throughout the calculation. Divide stitches by measured centimeters to obtain stitches per centimeter, then divide the total stitch count by that density for a width in centimeters. Select the corresponding unit mode when using the calculator; do not mix a centimeter span with an inch-based density.